Create Solana Liquidity Pool – Documentation & Guide
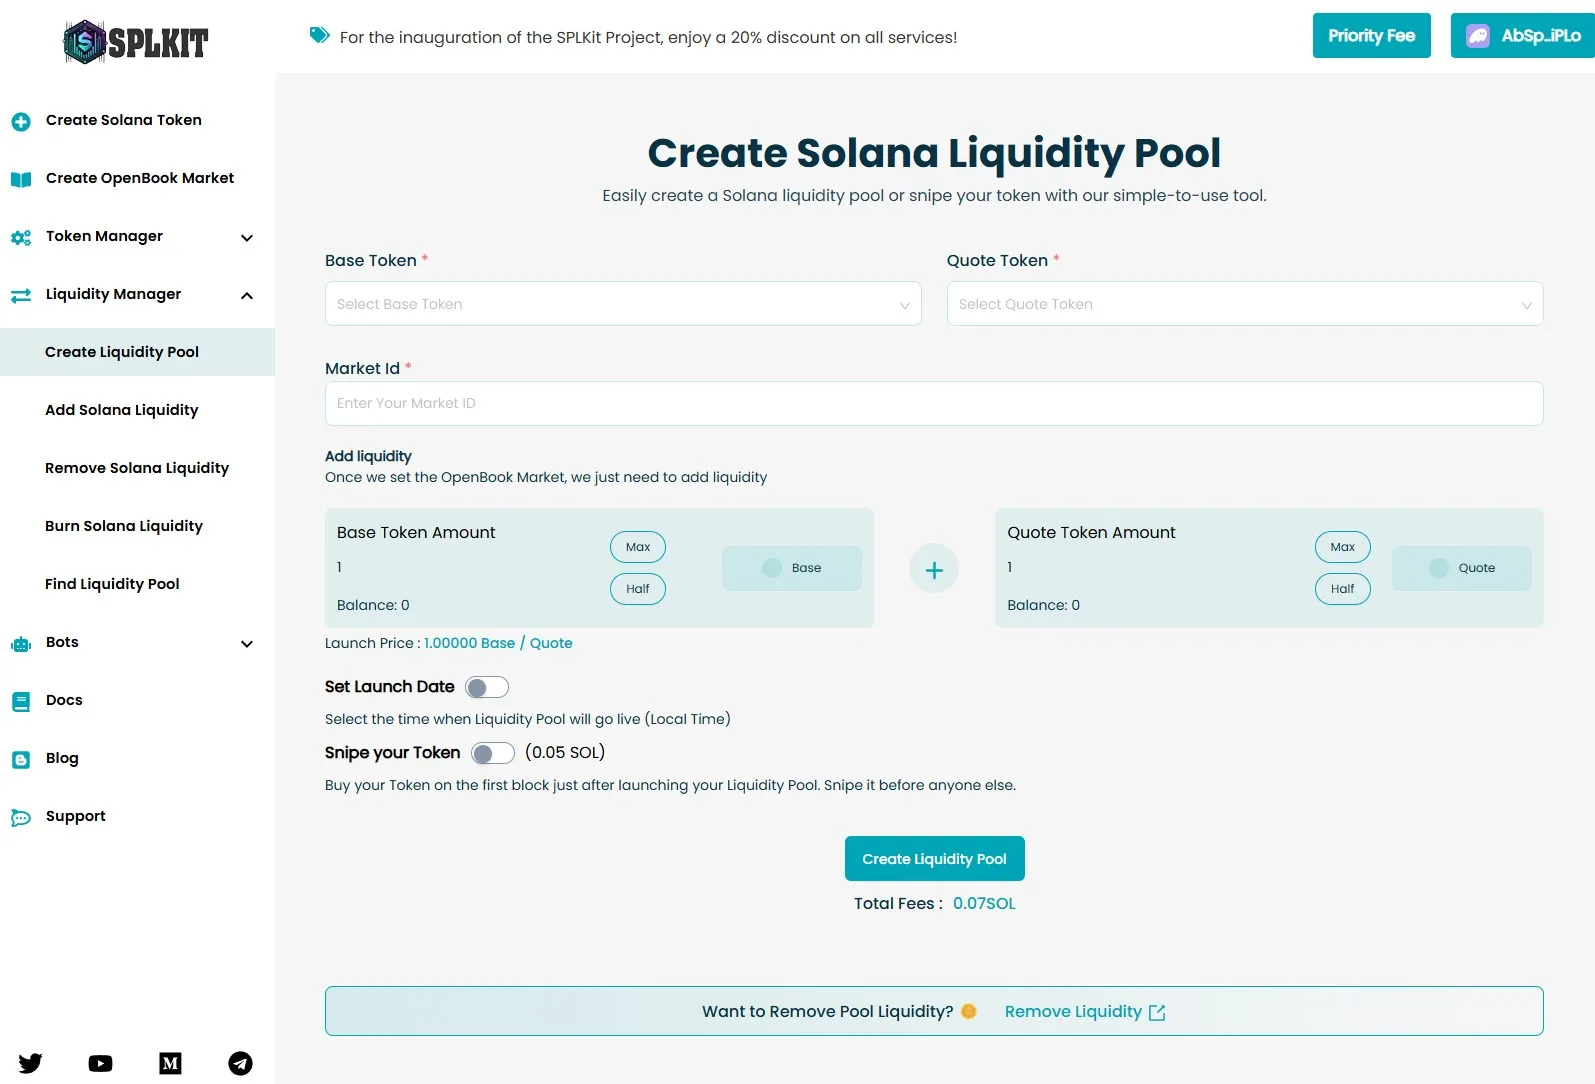
The Create Liquidity Pool feature allows users to quickly establish a customized liquidity pool on the Solana blockchain. This user-friendly tool enables you to set specific parameters, such as the tokens you want to include and the pool’s structure, allowing you to tailor your liquidity provision to fit your trading strategy. By creating a liquidity pool, you enhance the overall market depth, which improves the trading experience for all users and ensures smoother transactions. This feature is perfect for both experienced traders and newcomers looking to optimize their asset management and take advantage of the opportunities offered by decentralized finance (DeFi) on the Solana blockchain.
Instructions for Create Solana Liquidity Pool

Step-by-Step Guide to Creating a Solana Liquidity Pool
- Connect Your Solana Wallet
Ensure your Solana wallet is connected. This connection is necessary to interact with the blockchain and manage your tokens. - Select Base and Quote Tokens
- Base Token: Choose the base token from the list of available tokens. This token will be one part of the trading pair.
- Quote Token: Select the quote token from the list. This token will be the other part of the trading pair.
- Enter Market ID
Input the Market ID for your liquidity pool. This ID is essential for identifying your pool on the blockchain. - Add Liquidity
- Base Token Amount: Specify the amount of the base token you want to add to the pool.
- Quote Token Amount: Specify the amount of the quote token you want to add to the pool.
Ensure you have sufficient balances of both tokens in your wallet.
- Set Launch Date (Optional)
If you want to schedule the pool to go live on a future date, enable the launch date option and select your desired date and time. - Snipe Your Token (Optional)
Enabling the Snipe Token option allows you to purchase your token before anyone else, enabling you to buy it on the first block after the pool goes live. - Review and Confirm
Review all the details, including the base and quote token amounts, Market ID, and any optional settings such as launch date or snipe token. Ensure you have enough SOL in your wallet to cover the creation fees. - Create the Liquidity Pool
Click the “Create Liquidity Pool” button to initiate the pool creation process. Confirm the transaction in your wallet. This process may take a few seconds to a minute, depending on network conditions. - Monitor the Transaction
You will receive a notification confirming the creation of your liquidity pool. You can view the transaction details on the Solana blockchain explorer to ensure everything is in order.
